MacCHESS has positioned several webcams in the hutch to help you track automounter operations. An application for viewing the webcam streams, HutchTV, has useful features for automounter and remote use.
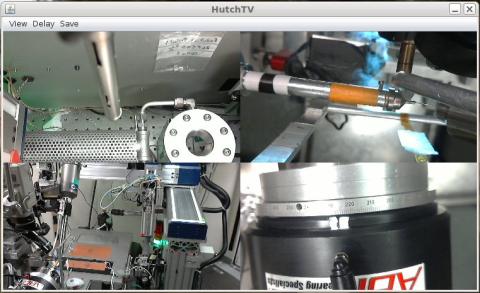
The webcams are viewable by double-clicking the "HutchTV" icon on the desktop. The HutchTV window is more compact than a web browser and will come up with an index page featuring a quarter-panel view from each webcam.
Switching views: You can switch between camera views in two ways. You can open the "View" menu and click on the radio-button for the view you want. The current possibilities are:
"Riding" follows along with the automounter gripper
"Gonio" is a close-up of the goniometer region, so you can verify whether a sample is mounted or not
"Panorama" is a wide view of the hutch
"PHI" allows you to verify the angle setting of the goniometer air bearing motor
"Multi-View" provides an index page with a quarter-panel view from each camera
Alternatively, Left-clicking the mouse on one of the full panels will get you to the Multi-View panel, and left-clicking on one of the quarter panels will bring up a full panel of that view.
Delay: A key feature of HutchTV is the ability to choke the frame rate so that the video updating does not swamp the connection of remote users. Clicking the "Delay" menu brings up some options:
"Delay On/Off" toggles the feature, with a checkbox to indicate status.
"Delay Time" brings up a panel to adjust the delay. 2 seconds (i.e. 0.5 fps) seems to be a reasonable starting point for most users. The "Delay" menu also gives the current frame rate in frames per second. Currently the full unchoked frame rate from our cameras is 5 fps.
Saving images and video: The "Save" menu brings up options for saving still images and streams.
"Snapshot" immediately stores a copy of the current view (whether a single view or the multi-view index) and brings up a FileChooser to specify a directory where it will be saved to a file. The file name is constructed with the time and date, e.g. "htv20180220_131507.jpg" The image saved is exactly what was being viewed in the HutchTV window, with the viewing resolution, and if selected, crosshairs.
"Save video" brings up a FileChooser to specify the directory for saving video streams. A separate file will be constructed for each stream, with the file name including the camera number and the time and date, e.g. "cam1htv20180109_1321.mjpg", "cam2htv20180109_1321.mjpg". Unwanted streams can be deleted by the user. The original video streams are saved, so these have their original resolution and frame rate and do not have crosshair overlays.
"Stop recording video" This menu option is not available until video is being saved. Clicking it will end the saving of video streams and close the files.
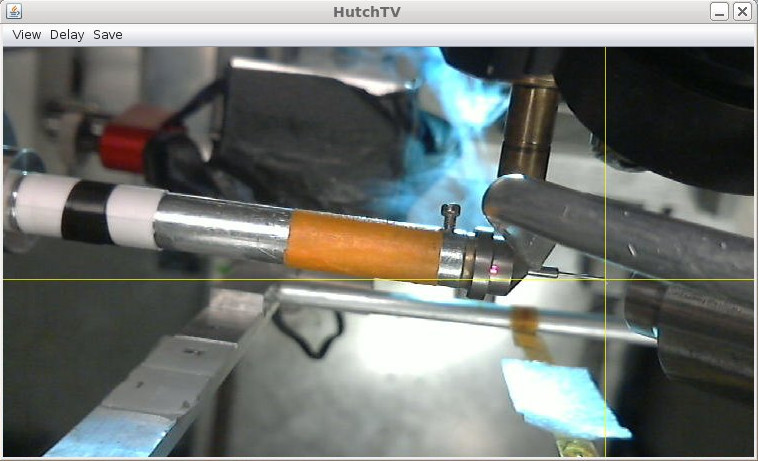
Crosshairs: Alignment crosshairs can be created by right-clicking the mouse. This can be done in either the full single view or the multi-view panel. right-clicking again will dispose of the crosshairs. The color for the crosshair overlay can be chosen in the "View" menu.
Configuration notes for management: The configuration directory (/home/specuser/src/hutchTV/conf) contains two files. "HutchTV.properties" contains the viewing resolution (currently set at 752x416 to match the resolution from our webcams), the URLs and menu labels for the assorted camera views, and the default directory for saving images and streams.
"Delay.properties" contains the parameters for the frame delay, so that if the software gets restarted it will come up again with the same delay settings. The "accessories" directory contains a Gnome2/Mate desktop file, the icon, and a startup script.
HutchTV was written in Java and Netbeans by David J. Schuller of MacCHESS. The MJPEG-reading portion of the code is based on work by shrub34, Copyright 2012.