Background
Residual stress refers to internal stresses that remain within a solid object in the absence of external applied loads. In structural components, especially metallic parts that support static or cyclic loads, residual stresses can significantly impact mechanical performance. Whether the presence of residual stress is beneficial or detrimental to mechanical response depends on details such as the sign, magnitude, and direction of residual stress, location and distribution throughout the part, and application conditions of how the part is loaded in service. Residual stress is also an important consideration during the manufacturing process; this is particularly true for developing additive manufacturing processes such as laser powder bed fusion, where generation of significant residual stresses during the build process can lead to distortions in part geometry or total build failure. In general, residual stress is a key consideration in mechanical design and engineering.
Because of the critical link to performance, the aerospace industry is deeply concerned with residual stress, and invests heavily in ways to model, measure, and engineer the presence or absence of residual stress for the vast array of components that comprise products like engines and aircraft. Despite significant innovation in these areas, however, a persistent challenge remains in developing a best practice for quantitative measurement of residual stress.
Stress cannot be measured directly, but rather can be calculated using Hooke’s Law from measurements of elastic strain when combined with knowledge of the elastic properties of the material. X-ray diffraction provides a means of directly measuring the elastic strains of a crystal by comparing the spacing of crystallographic lattice planes to those of an unstrained reference. Performing such measurements at a high energy synchrotron facility such as CHESS enables orders-of-magnitude greater efficiency and fidelity of elastic strain measurements, representing a great opportunity for addressing residual stress challenges.
MSN-C was founded in large part to develop and devote synchrotron-based methods to address challenges facing advanced manufacturing, including determination of residual strain.

What was achieved?
With broader impacts like these in mind, a concerted, long-term effort at SMB to generalize and streamline measurement of residual elastic strains in as-manufactured parts has now culminated in a demonstration of this capability in a series of automated measurements on multiple, complex-shaped samples.
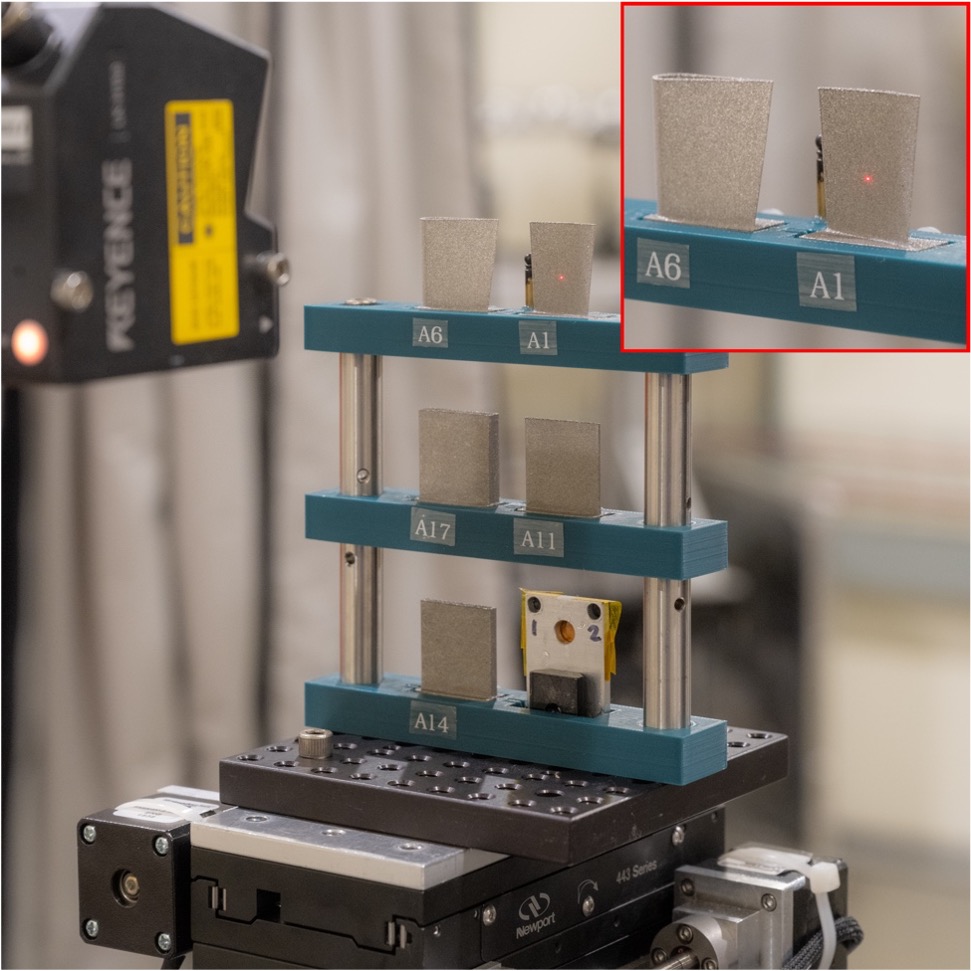
Figure 2 shows the five additively-manufactured titanium components used for this demonstration as mounted at SMB. A critical aspect of this effort is deployment of in-line, laser-based metrology to both reduce error and automate data acquisition. The near-net-shape samples were designed to emulate different common geometries. The top two parts contain twist and curvature typical of a gas turbine engine of a fan blade.
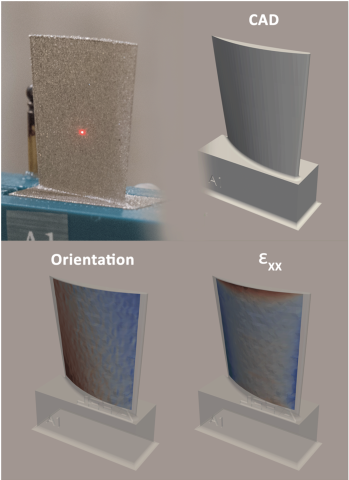
The measurement process consists of an initial two-dimensional scan with the laser to determine the sample shape and location relative to the x-ray beam and rotation center of the stage. Figure 1 (lower-left) shows an example map of sample angle resulting from the laser scan on one of the parts. The information from this map is then used to generate a multi-dimensional x-ray scan trajectory that maintains constant average sample-to-detector distance as well as desired sample rotation.
For each of the samples in Figure 2, approximately 1500 different sample positions were measured, with x-ray powder diffraction patterns obtained over a small range of sample orientations at each position. This sequence corresponds to approximately 150 GB of data, which is then analyzed to extract strain. A second key achievement of this work is that the analysis was also largely automated, permitting the large data sets obtained on each sample to be reduced and analyzed in just a few days.
The laser metrology conducted for data acquisition also permits the resultant strain maps to be overlayed onto the part itself, an example of which is shown in Figure 1. The top edge of the sample shows a region of high tensile strain in a direction parallel to that edge resulting from the build process.
Why SMB @ CHESS:
The work described here exploits both the combination of high x-ray intensity and high x-ray energies only available using synchrotron radiation, as well as the particular mission of MSN-C to develop methods relevant to challenges facing advanced manufacturing.
What does this advance mean for future work?
The achievement described here demonstrates that similar measurements, which provide critical information related to residual stress on complex parts, may be achieved more routinely than ever before. Such routine access to information on high value components and new process methods holds great potential value for both DoD and commercial manufacturing.
